
How to take a screenshot on a Windows 11 PC
Windows 11 took the Snipping tool to the next level in Windows 11. Not only the Snipping tool can take a screenshot of a part of your screen or use a delay to help you capture an open drop-down but now it can take short videos that you can use to demonstrate a short functionality to a colleague by quickly snipping a video and attaching it to an email or sending ti through a Teams chat.
The Snipping Tool
The Snipping tool helps you take a selective screenshot on a Windows 10 or Windows 11 PC. Instead of capturing your entire screen, you can now capture one specific area of the screen into an image that you can save, paste into a presentation or a WordPress post.
Not only you can capture a static image but also a video recording of your screen.
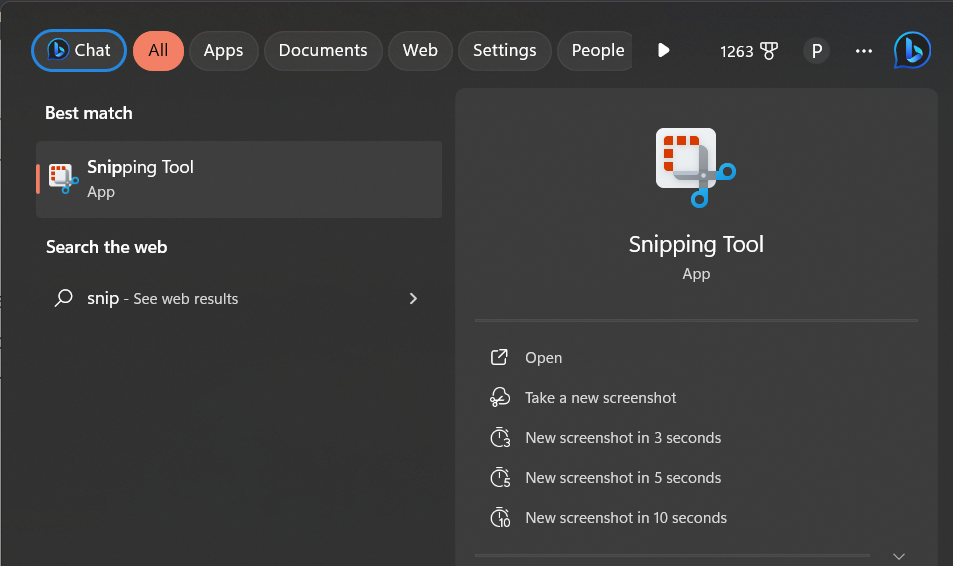
You can access the Snipping tool in your start menu or by searching for “snipping” in your search bar.
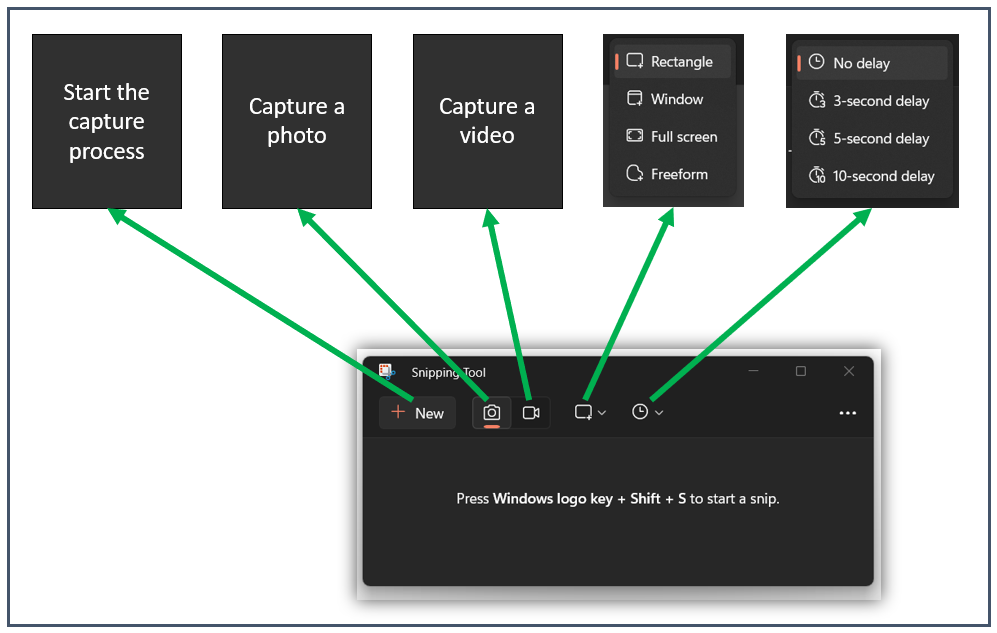
This is how the Snipping tool looks when you first start it.

Notice all the options of the Snipping tool.
- You can first decide if you want to capture a photo or a video.
- Then you can decide if you want to capture a rectangle, a window, the full screen or a freeform selection. The rectangle mode and the freeform mode will allow you to do a selective screenshot on Windows 11.
- Lastly, you can decide if you want to capture immediately or if you want to have a short 3, 5 or 10 seconds delay to prepare your scene. This can be very helpful if you want to capture an open drop-down menu or a text that only shows up when hovering with the mouse over it (a tooltip)
- When you’re ready, press “New” and start the snipping process.
Once the image is captured, you have additional options. You can now mark the image, highlight, erase your markings or use a ruler to draw straight lines. You can also do additional editing in Paint or save the image on your computer in an image format like jpeg or png.
Just hover over the options on the top bar.
If you want to see a detailed video and learn how to use these features, click below.